
Over ten years ago, I replaced my main lounge TV with a projector. I did this because I like having a truly large screen and because I hate how big TVs dominate a room. When the projector is off, there is no TV, it's just a wall. Of course, you get better resolution with a TV but that is the trade-off. And my Hi-Definition projector gives a pretty good image.
Of course, if you have a projector, you do need some kind of TV-receiver/DVD player etc. to make it work. I opted at the beginning to use a MediaCentre PC, initially with Windows XP MCE and later with Windows 7. This has certain advantages such as, you automatically have a digital video recording system (long before they were common-place) and a 'Smart TV' in that it's connected to the internet and will show my photos, beautifully and instantly. There are lots of media software options too to make the interface nice to use - I am currently running Windows 7 Ultimate with Media Centre because I've never got round to trying out other options.
As far as I can see, the only real downside of this approach is that you need to put a computer tower somewhere.
I used to have this case:

Now, it's a perfectly servicable case but it's not exactly pretty. I've been thinking about building a case for a long time but moving to a new (and very nice) house inspired me to finally get my act together and design and build what I wanted.
Generally speaking with computer cases, one of the features I look for is that they are easy to access, as anyone who home-builds knows, the need to get inside to upgrade or service/replace parts makes it really annoying if you have to undo dozens of screws first. I exaggerate but you get the idea - the easy of access and ease of installing components is high on my list of features, right after having the number of drive bays, expansion slots etc. that I want. This case is a little different, here I had to compromise access for ascetics, but I think it was worth it, this one time.
 As a practical point, there are several ways to approach this. There are some beautiful examples on the web and some quite clever ideas. I decided that the easiest approach was to buy a case that had the features I wanted as a chassis to underpin my wooden box. This makes the siting of components so much easier. I also managed to pick up a 'cosmetically damaged' one from eBay for less than £20, which given I didn't care about the outside that I was throwing away, seemed to be a good deal.
The case I went for is the Kolink Aviator White ATX Mid Tower. I liked this tower, primarily because it seats the power supply at the bottom for best air flow and temperature control which is critical with a wooden case (more of that later) and it had some nice additional bits like the USB ports and switchable fans that I was able to incorporate into my new case. The other purchase for this build was a power switch and LEDs from eBay for about £1.50 with much longer leads than standard hence being able to put the power switch exactly where I wanted.The picture shows the stripped down carcus ready for me to build round. The basic idea is very simple and simply involves cutting some pieces of MDF to fit wound the metal chassis.


In order to mount the wood cladding to the metal chassis I drilled holes though the metal so I could use wood screws for fixing.
One of the key design features of this case is that it appears to be floating. This is for two reasons, firstly because with the powersupply at the bottom of the case this allows good airflow for better cooling and also because it makes for nice aesthetics.

The two pillars were cut and shaped from softwood.


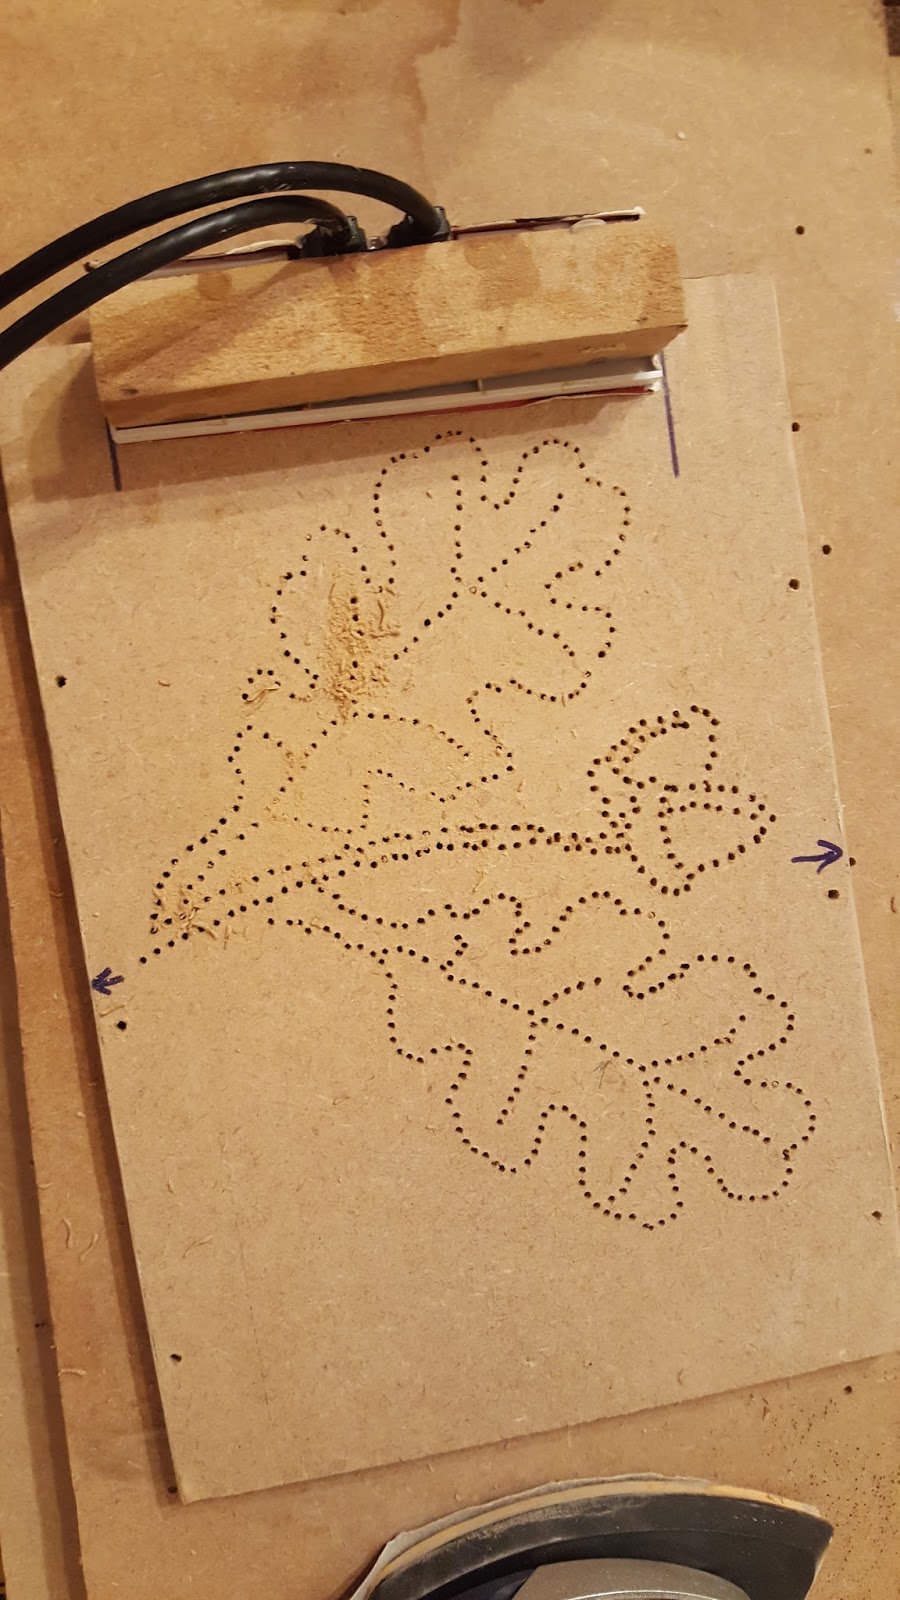
The front of the case has essentially two features; the top part is hinged to allow access to the DVD drive bays (and also 2 USB ports) and the lower part has several holes drilled to create an extra vent. The 'oak-leaf' pattern was chosen to match the oak finish it was eventually going to get.


In order to mount the power switch in the base part of the case, I used my router to create the space and simply glued the switch and LEDs in place. A small piece of dowel completes the button.


I then mounted the fan switches on the top of the case.


That's essentially the case with just a few final touches. Again I used the router to create space for cables to run under the motherboard. I added a little cable tidy for the power cable at the back and finally installed the USB ports behind the same door that allows access to the DVD drives.


So that's the complete case.

MDF gets a bad rep but it's a very versitile, light weight and cost-effective material. It is not, however, pretty. So, the real final touch is the oak-effect finish, which is acheived with an iron-on oak vaneer and clear varnish.

And the finished article:

I did find that the cooling wasn't quite good enough despite it only being a relatively low-powered system (AMD 2.3GHz Quad core processor, GeForce 210 1024Mb graphics card and Blackgold Dual TV tuner).
This I rectified by installing a Cooler Master Hyper 212. I have used one of these on another system and been very impressed by how effective it is.


AFZ